
A friend of mine recently found an extra large tote bag that she fell in love with! It would be perfect for her company, she said. She had every intention of ordering said bag from the company who makes it, but one thing led to another and she ended up joking with me, saying "maybe I can convince you to make it for me". From there we talked about what exactly she did and did not want from this bag and I started designing the bag on paper. Eventually I felt confident in my design and committed to making her this bag. My friend chose to use solid colored duck cloth to match her company colors, but you're options are endless if you want to use a patterned indoor/outdoor fabric.
Now, when I say this is an extra large tote, I mean it. This bag is huge. A person could easily curl up into it. The dimensions are approximately 24" wide x 17" tall x 11" deep.
(click on photos to see them larger)


What you need:
Main Duck Cloth Color ~ 1 1/3 yard (dark blue)
Accent Duck Cloth Color ~ 2/3 yard (turquoise)
Cotton Lining ~ 2 1/4 yard (orange)
1 - 7" zipper
1 - 22" zipper
thread(s)
water soluble pen
small amount of interfacing (approximately 15"x8" piece)
What you will cut:
(not to scale)


Phase 1 - Front Pocket
Once you have all your pieces cut and embroidered (optional) you are ready to begin the construction of the bag. We'll start with the front pocket. Take the 9 1/2x12" main piece and lay it on top of the 10 1/2"x12" contrast piece. The 12" sides are the top and bottom. Bottom raw edges even. Fold the contrasting overhang piece (at the top) in half, then in half again. Press.


Stitch along the top.

Phase 2 - straps
When I cut the pieces for the straps I included the selvages because I needed the extra length and I knew they wouldn't show. Take one strap piece at a time and fold one side into the center and press (approx 3/4") all the way along the long side.


Repeat for all 4 strap pieces.
 |
| one turquoise strap is missing from this picture. I actually messed up my first set of navy straps and had to start over using pieces that weren't as wide as I'd have liked, that's why the navy straps in this picture don't match the two above it. In the end it's important that your straps all 1 1/2" wide when finished. |

Next, sew. I used navy for the main thread and turquoise in the bobbin, because I wanted contrast. Start at one end of the strap with the wrong side facing up. Sew close to the edge.

When you reach the turquoise fabric keep sewing while trying to keep the edges even (the pins should help).


Phase 3 - constructing the bag
Lay the front piece of your main color right-side up. Find the center of the main piece and the center of the front pocket piece you already constructed. Center the front pocket on top of the main piece, bottom raw edges even. Pin the pocket in place, but don't place any pins on far left or right side of the pocket. Put them at the top, bottom and center of the pocket if you want. If you do put pins on the left and right sides you risk sewing them into place (i did). So be careful :-p. To determine the placement of the straps you want to take 2 things into account. First, you want the straps to overlap the front pocket approximately 1/2". Second, you want the turquoise to overlap the navy approximately 1" from the top.

Make sure the straps are straight and pin them in place. This is a good time to pin the left and right sides of the pocket.


Repeat the same process on the other side of the pocket.
Now do the same thing to the back of the bag, excluding the pock. Measure the location of the front straps to determine the placement of the back straps. Pin down and sew.
Place one of the side pieces on top of the front, right sides together, raw edges even. Pin, sew, then serge edge. Press.

Repeat for the other side piece.
The wrong side should look something like this

With right sides together sew the back piece to the raw edges of the side pieces, much like you just did the front.
Phase 4 - bag bottom
Cut 2" squares from the four corners of the bottom piece.

Fold the 2x2 square at the inner corner so that one edge of the 2" square lines up with the other edge (hard to explain)

Serge around the entire raw edge.


If I were to do this again I think I would do it differently. I would do it the way I did the zipper pocket (which I explain below). Take one of the top pieces and lay it over top the zipper (right sides together, raw edges even). Sew together using the zipper foot. Fold it back and finger press. Repeat on the other side of the zipper using the other to piece. Top stitch all the way around the zipper.

Since the zipper is 22" and the bag is 24" wide you will have to pinch together and sew the fabric on either side of the zipper so that you don't have gaps. Do this on both sides.

With right sides together pin the top section to the bag (similarly to the way you did the bottom). Make sure you tuck the straps inside the bag.


Sew along the edge, rotating at corners. Make sure you don't sew the straps. Serge. Press the seam allowance away from the zipper.
If you don't want a lining or a cardboard thing then I dare say you are done. If you want cardboard but no lining skip down to Phase 9.
Phase 6 - zipper pocket
Now we're working with the orange lining fabric. Here you can use contrasting fabric with different patterns, which you have to take right-sides, wrong-sides, and direction into account, but I'm using solid cotton that's the same on both sides.
Place the 10"x12" pocket piece and center it on the back piece of fabric, about an inch from the top. Pin fabric down. Draw a 7 1/4"x1/2" rectangle in a couple inches from the top, centering it left-to-right.
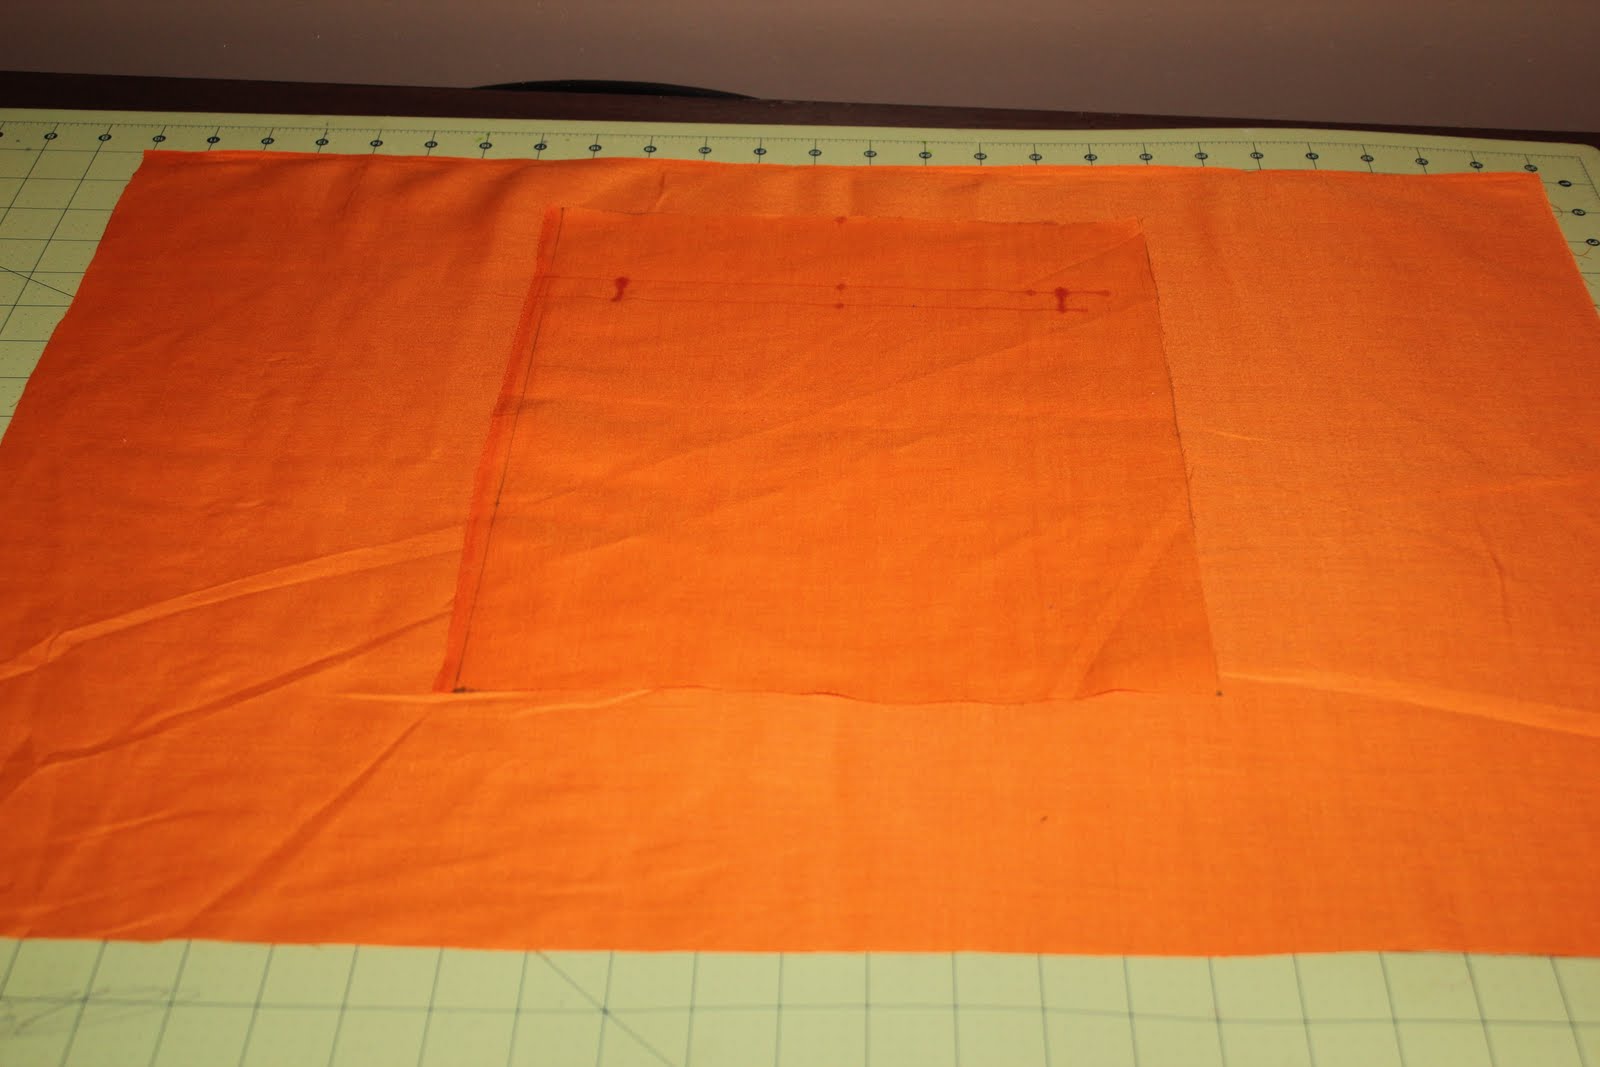


Stuff the pocket fabric in through the slit you just made so that there's a clean rectangle. Press.
 |
| In case you're wondering, my iron leaked and left water marks on my fabric (ugh). |


Here you will be using the two 15"x8" pieces of fabric and some interfacing. Adhere the interfacing to one of the pieces of lining. With right sides together sew the 2 pocket pieces together, leaving a small gap at the bottom of the pocket. Clip corners. Turn the pocket right side out and press. Center the pocket where you want it on the front piece of lining fabric. I had the piece of pocket with interfacing facing right side up (the seam allowance underneath was too visible on the other side, if that makes sense). I centered the pocket right-to-left and put it a couple inches from the top. Be sure to put the the open section at the bottom. Determine where you want divisions and use a water-soluble pen to mark the lines. I wanted to evenly divide my pocket into two sections but you can do it however you'd like. Some people choose different sizes, some people make a slot for a pen/pencil, etc.


Phase 8 - constructing the lining
This phase is very similar to the main bag construction. Pin a side piece to the side of the front of the bag. Sew. Serge. Press. Repeat on other side.

Once the 4 sides are sewed together press under 1/2" from the top all the way around. You can do this before you sew the 4 sides together if you prefer.
Refer to Phase 4 for the construction of the bottom of the lining. Attach it to the lining sides in the same manner.

To attach the lining to the bag simply sit the lining in the main bag with wrong sides together. Line the ironed edge of the lining to the top seam of the duck cloth where the sides meet the zipper panel. Pin the lining down. It's tricky to maneuver the bag around your sewing machine but this is the best way I could think of that doesn't show the seam allowances. Sew the lining to the bag just under the existing seam, making sure the duck cloth seam allowance is tucked down behind the lining.

I used orange thread with navy in the bobbin. Some orange popped thru to the outside of the bag, but nothing too major.

Phase 9 - cardboard
we're almost done. Since this bag is so big it needs something to give it some structure. I cut 2 piece of lining that's about 11"x24" (the size of the bag) and a piece of cardboard that's about 10 1/2"x23 1/2" (you can size these 3 pieces a 1/2"-1" larger if you'd like). On one of the short sides, iron 1/2" of the lining down on both pieces.

Sew.

With right-sides together and raw edges even, pin the 2 pieces together and sew around the 3 sides with raw edges. You are creating a pillow case for the cardboard. Clip corners.


Turn right side out

Slide cardboard inside and...

voila - you're done. Now you have a place to stash that dead body... (j/k of course)

